 EstateMate
Register and join your community
Create your account in the app, pick your estate and property, and find out what happens while your community approves you.
- Tap Create Account? on the login screen and complete four short steps.
- Pick your estate and your property number from the lists. Typing them isn't enough.
- With a One-Time PIN you can log in straight away. Without one, your community approves you first and tells you by email and SMS.
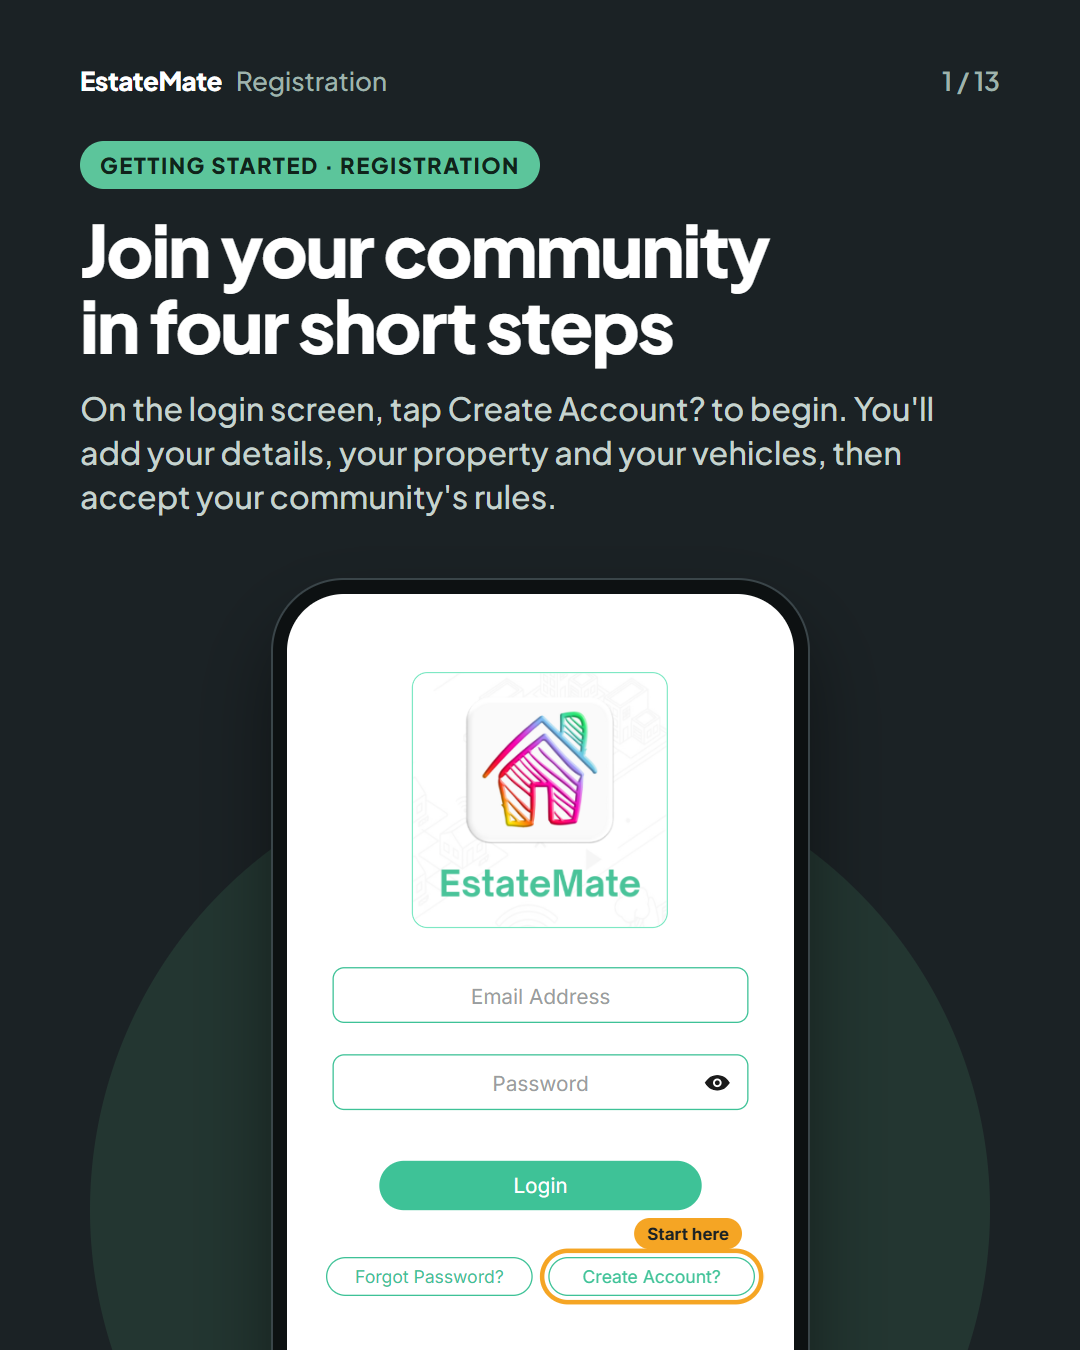
Open the app and tap Create Account?
On the login screen, tap Create Account? to begin. You'll add your details, your property and your vehicles, then accept your community's rules.
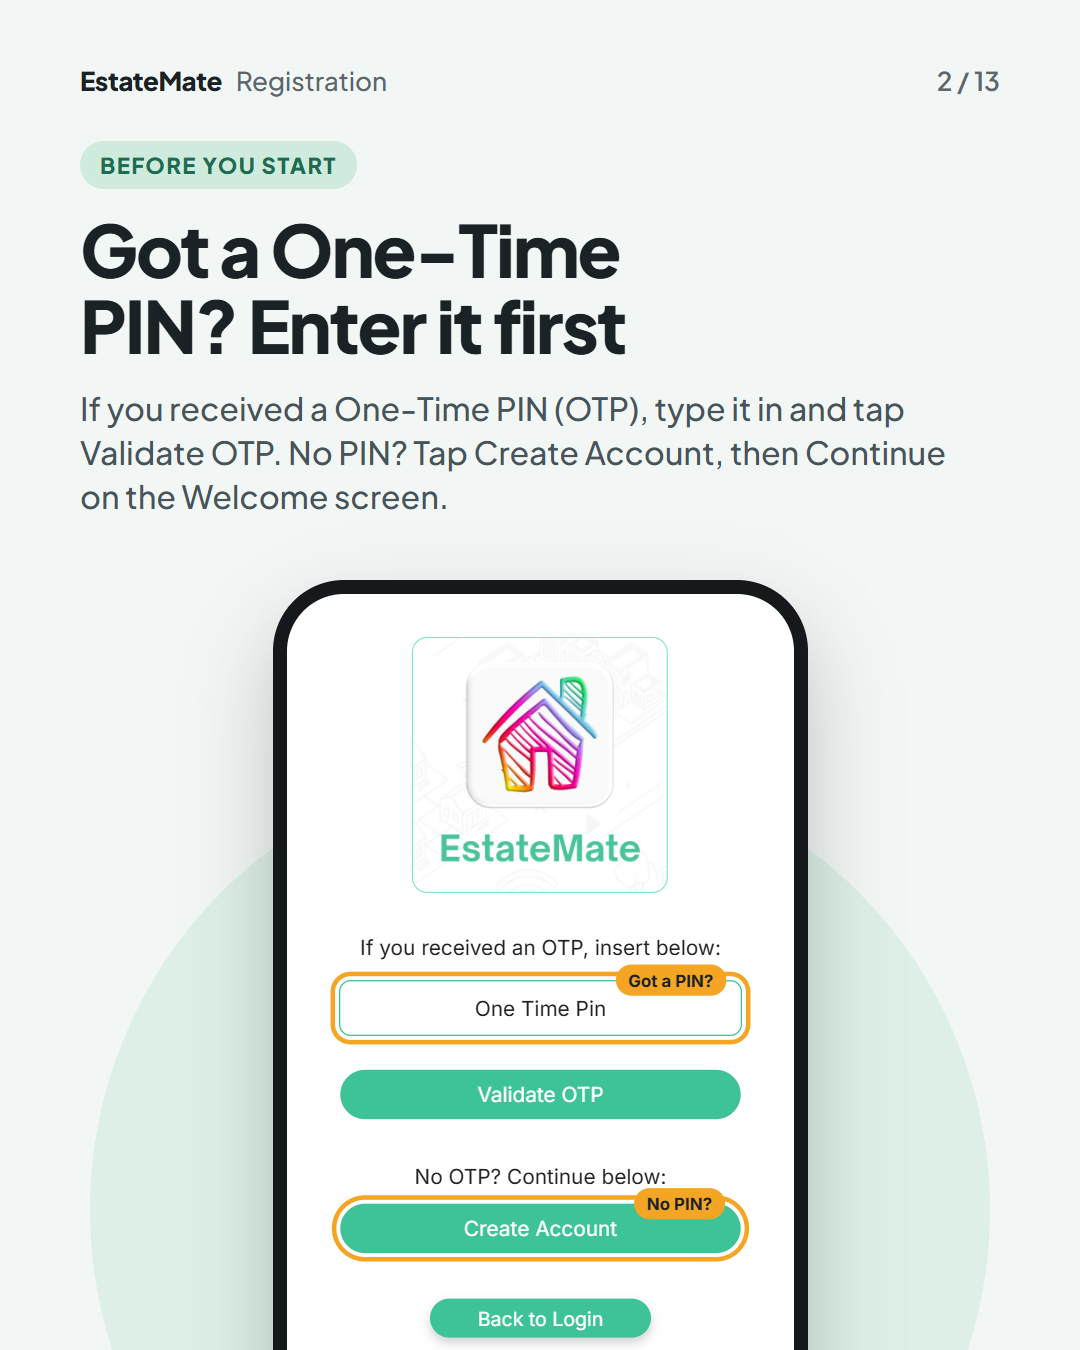
Got a One-Time PIN? Enter it first
If you received a One-Time PIN (OTP), type it into One Time Pin and tap Validate OTP. No PIN? Tap Create Account, then Continue on the Welcome screen.
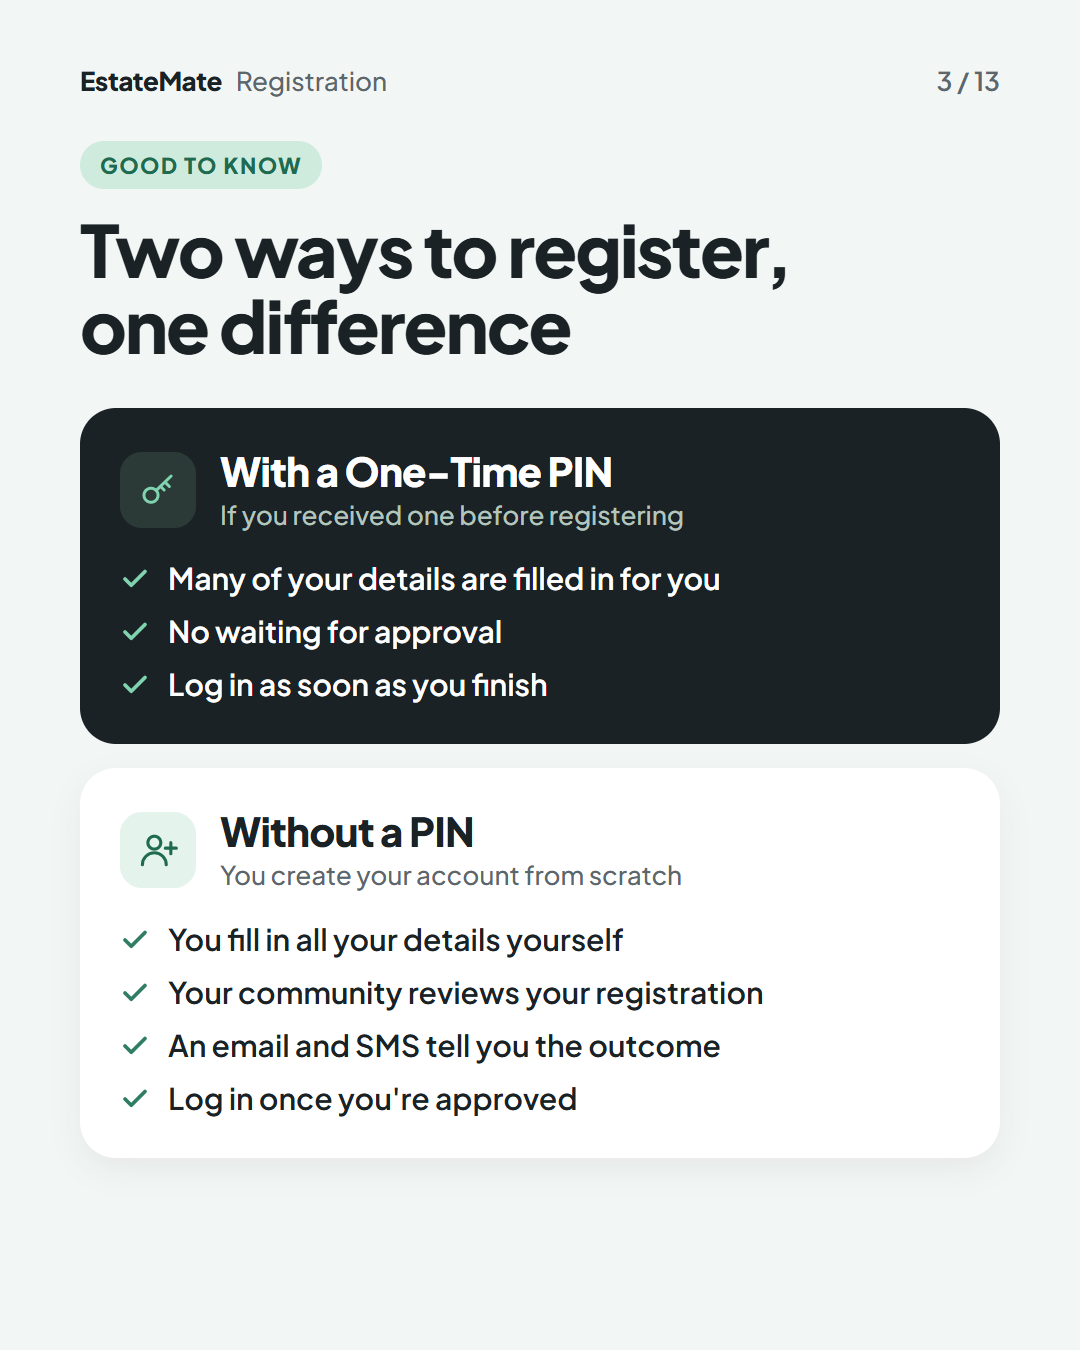
Good to know: two ways to register
With a One-Time PIN, many of your details are filled in for you, there is no waiting for approval, and you can log in as soon as you finish.
Without a PIN, you fill in all your details yourself. Your community reviews your registration, and an email and SMS tell you the outcome. You can log in once you're approved.
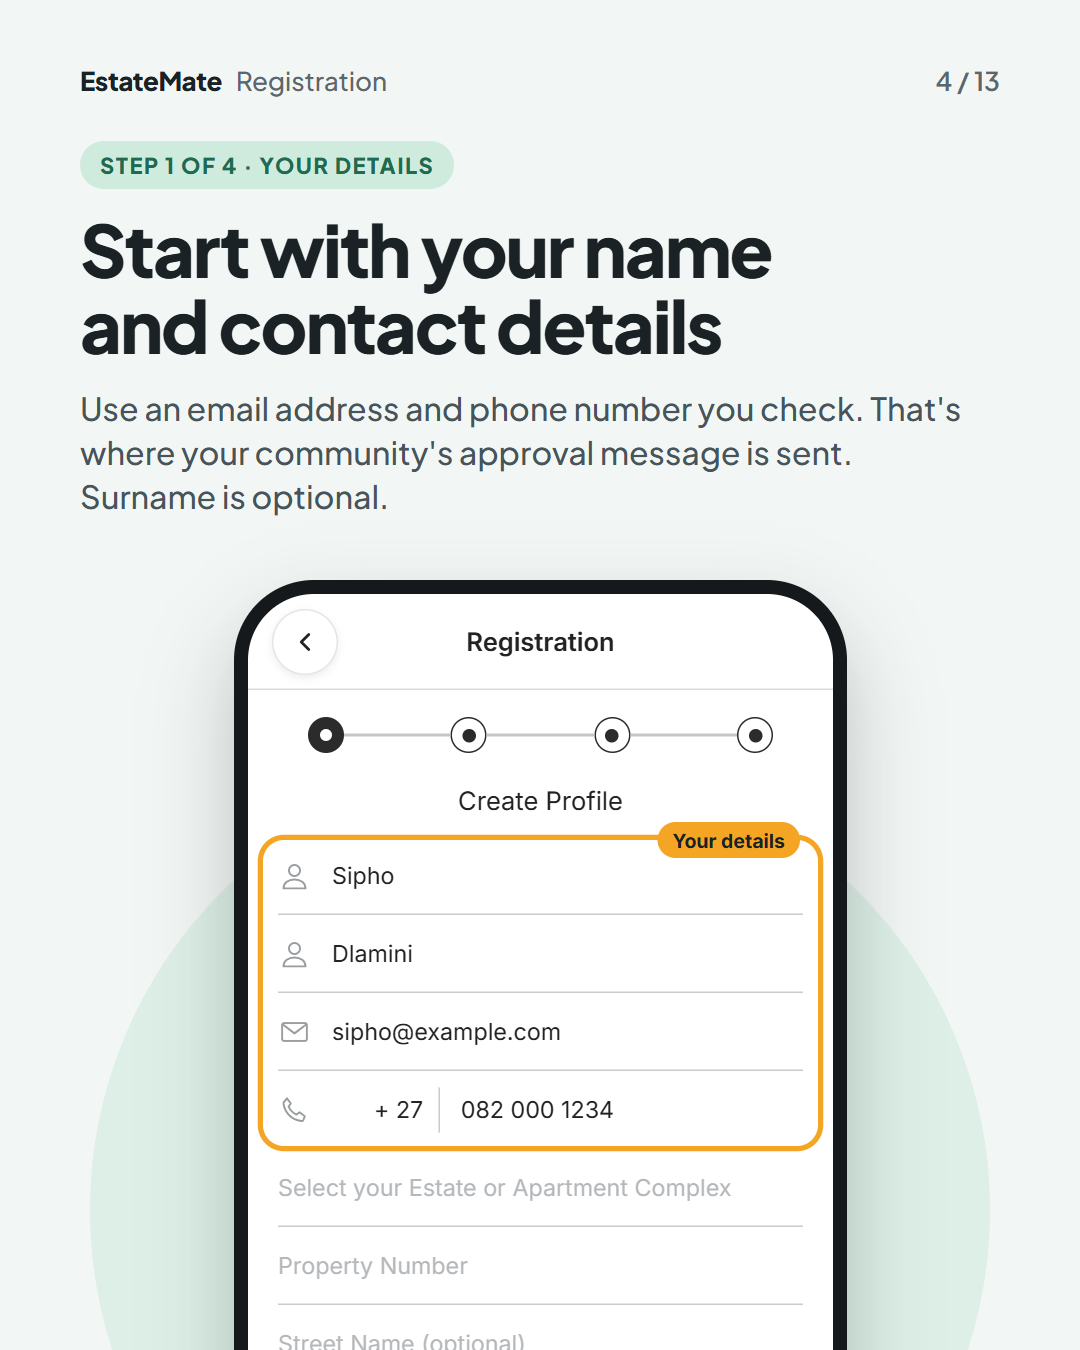
Step 1 of 4: add your name and contact details
Under Create Profile, enter your name, email address and phone number. Use an email address and phone number you check, because that's where your community's approval message is sent. Surname is optional.
Step 1 of 4: pick your estate from the list
In Select your Estate or Apartment Complex, start typing the name, then tap your estate in the list that appears. Typing the name alone isn't enough.
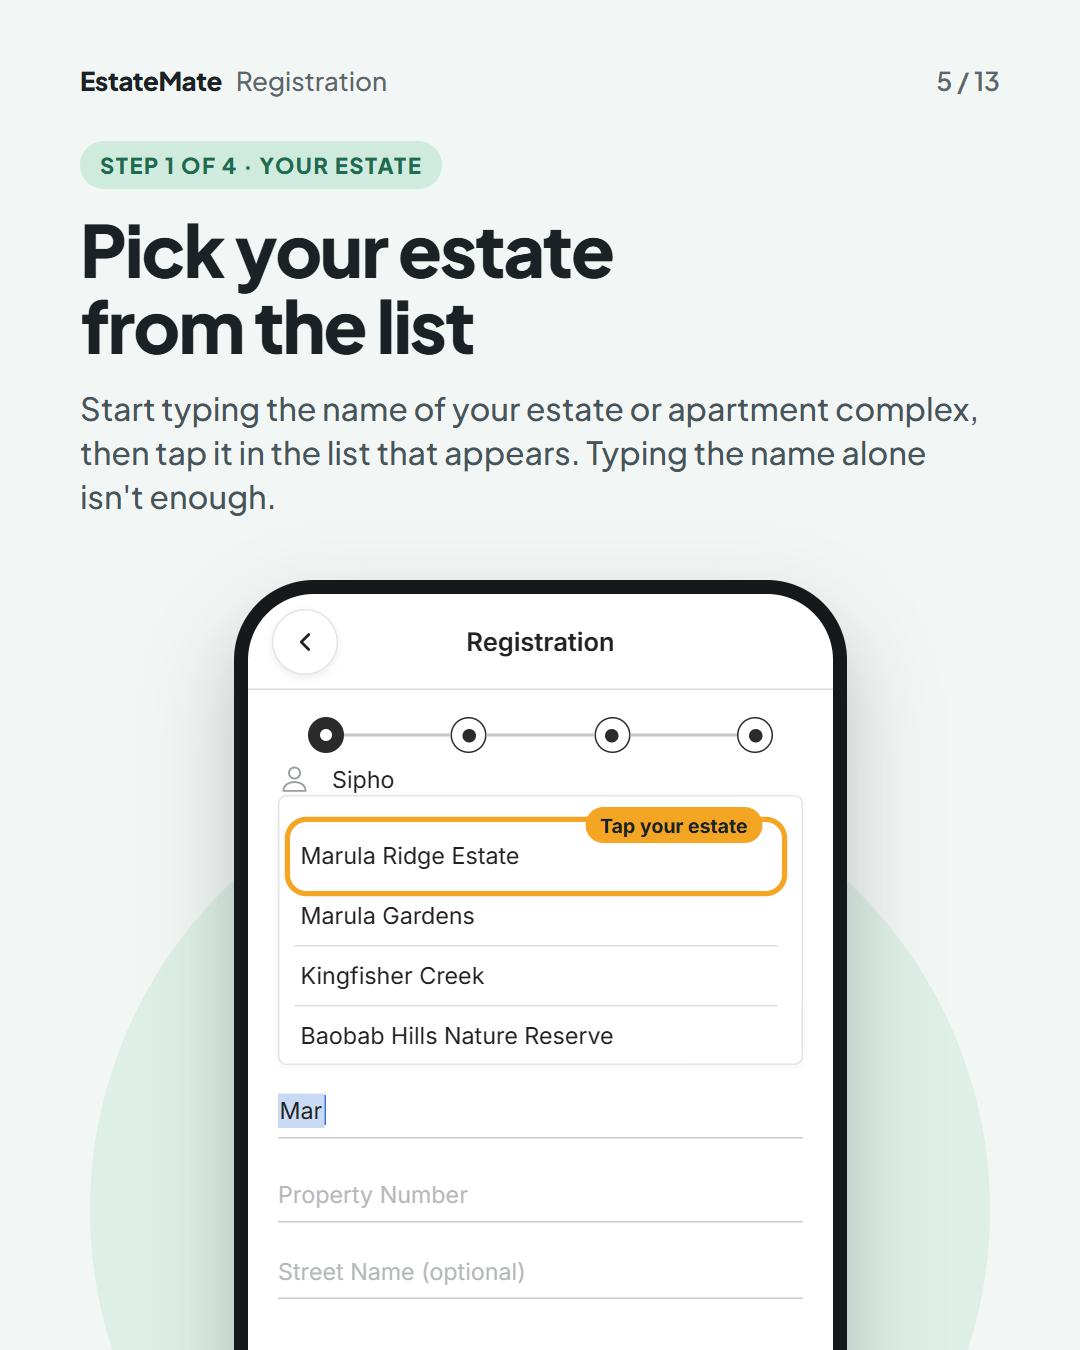
Step 1 of 4: pick your property number
In Property Number, type your number and tap it in the list. The numbers only appear once you've chosen your estate. Street name is optional.
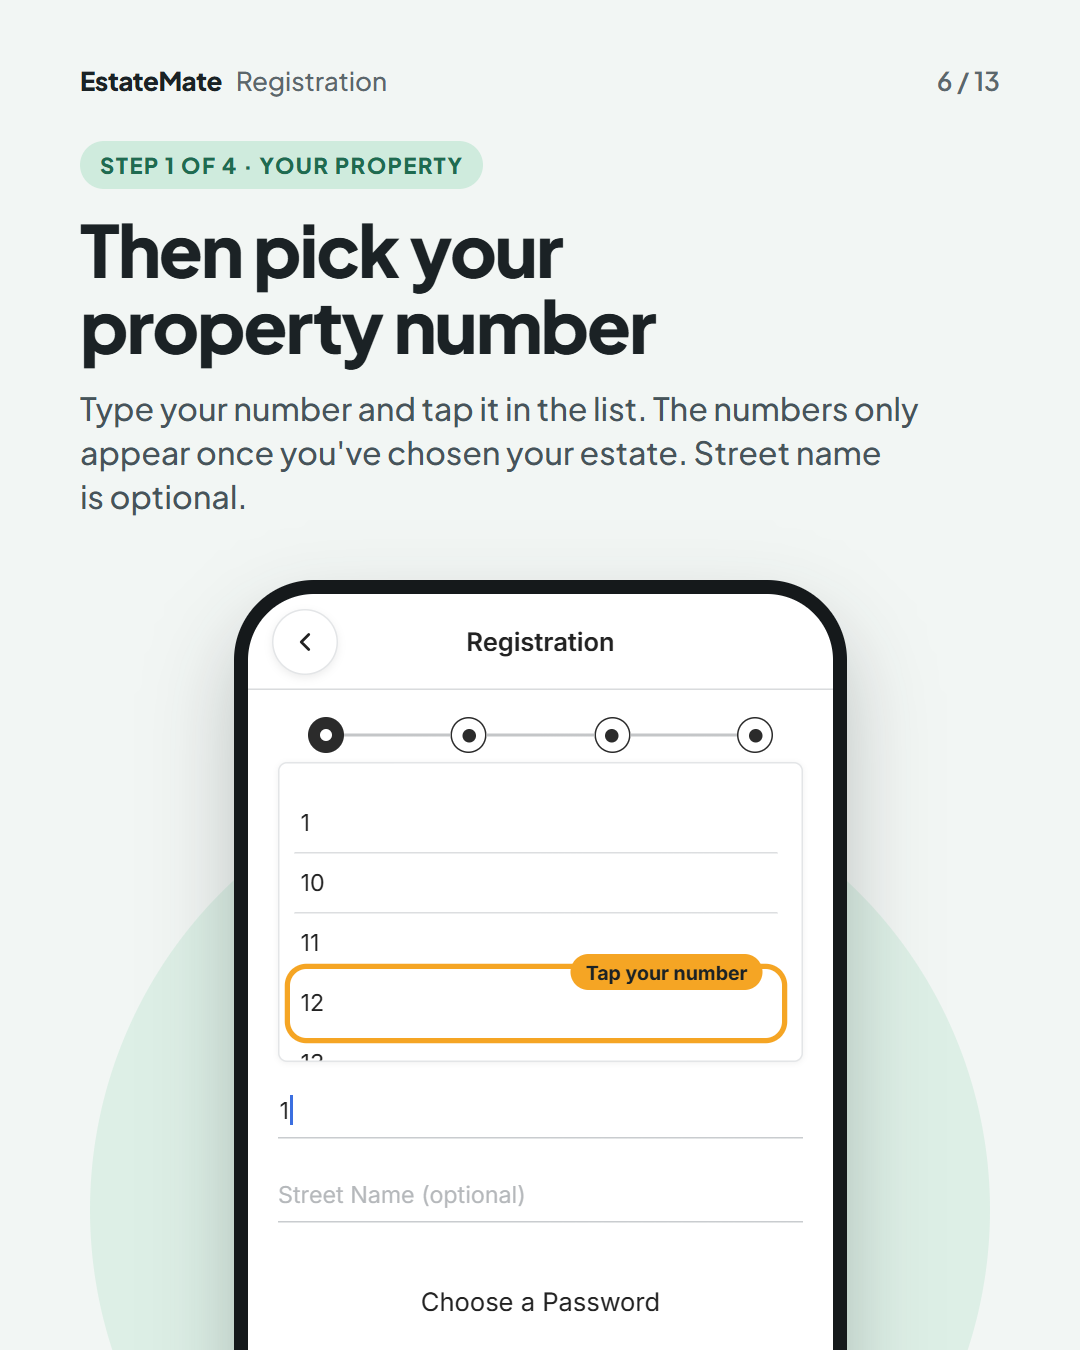
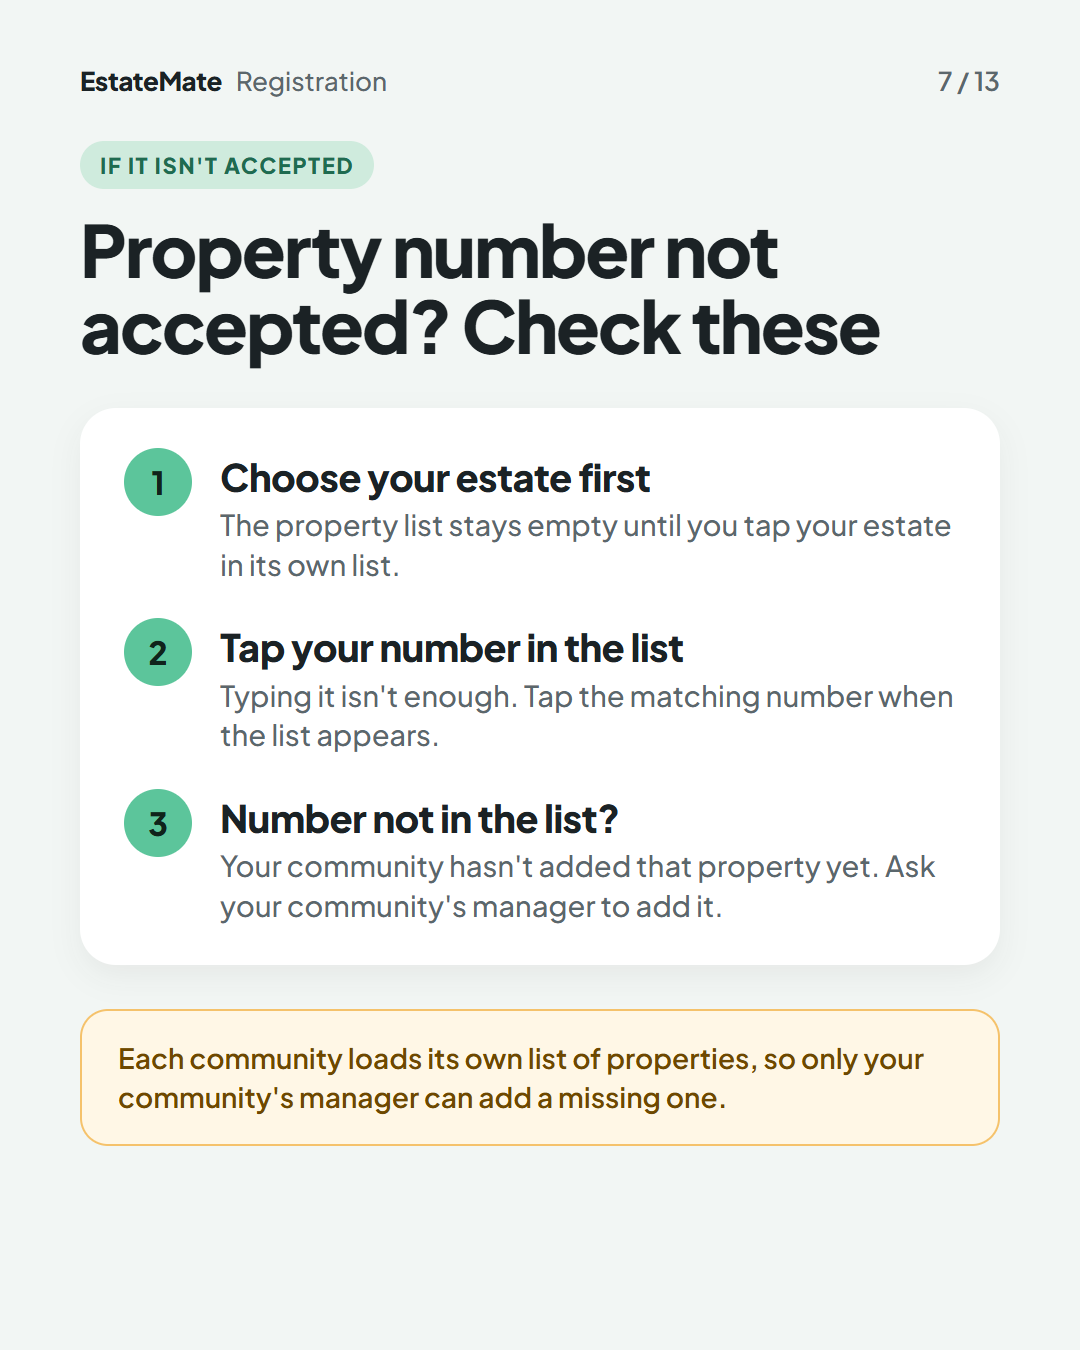
If your property number isn't accepted
Check three things:
- Choose your estate first. The property list stays empty until you tap your estate in its own list.
- Tap your number in the list. Typing it isn't enough. Tap the matching number when the list appears.
- Number not in the list? Your community hasn't added that property yet. Ask your community's manager to add it.
Each community loads its own list of properties, so only your community's manager can add a missing one.
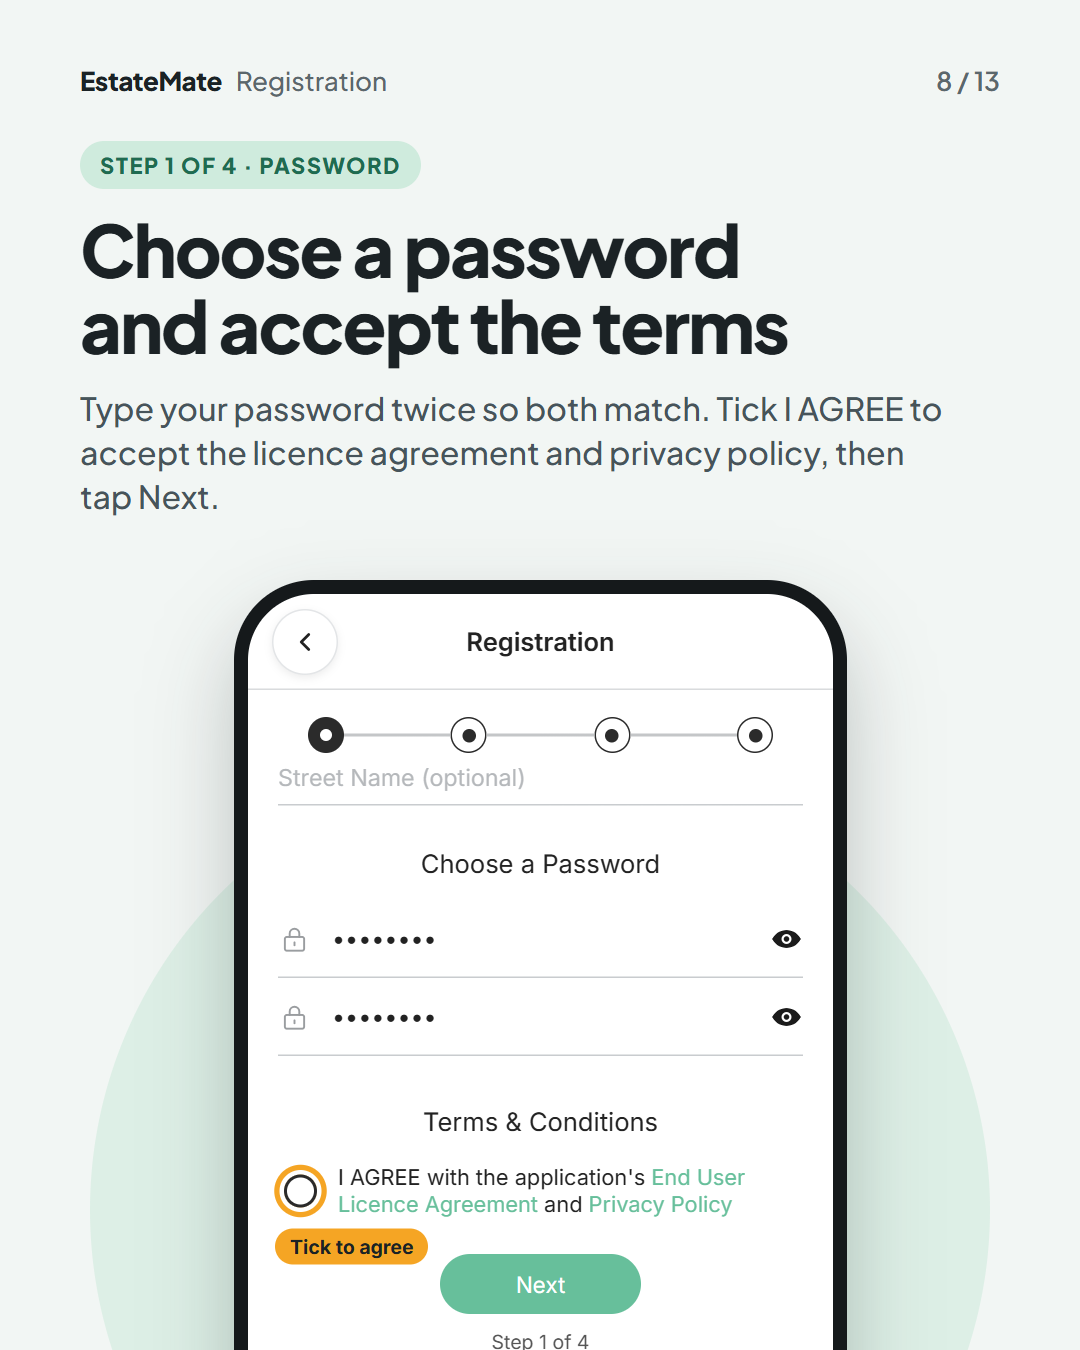
Step 1 of 4: choose a password and accept the terms
Type your password in Password and again in Confirm Password so both match. Tick I AGREE to accept the End User Licence Agreement and Privacy Policy, then tap Next.
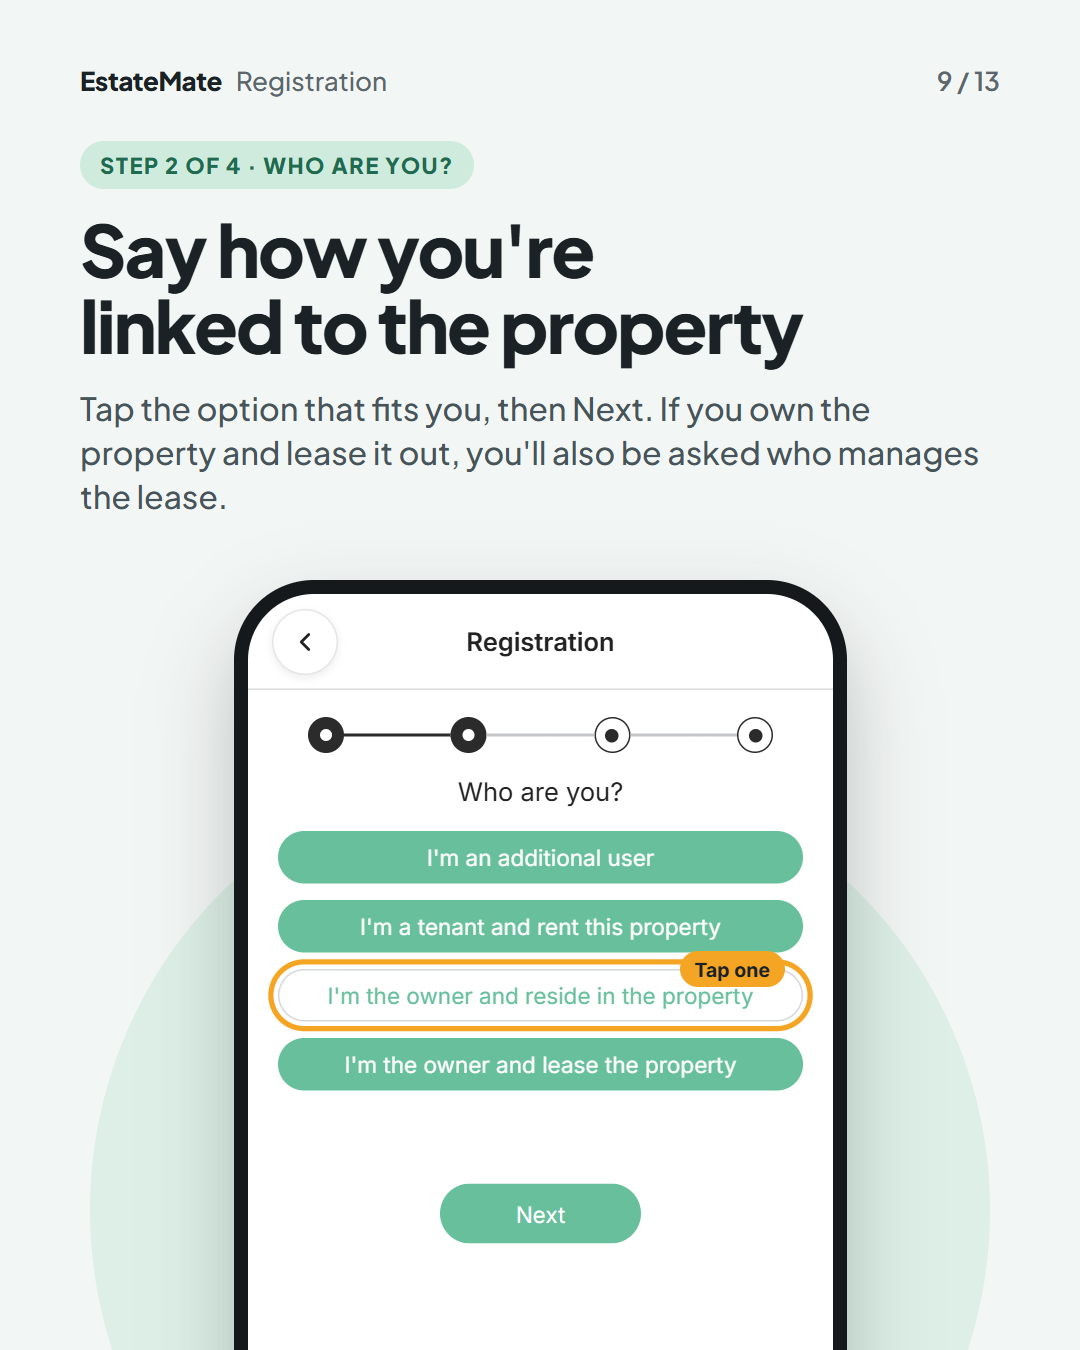
Step 2 of 4: say who you are
Under Who are you?, tap the option that fits you, then Next:
- I'm an additional user
- I'm a tenant and rent this property
- I'm the owner and reside in the property
- I'm the owner and lease the property
If you own the property and lease it out, you'll also be asked who manages the lease: Self-Managed or Agent. For an agent, add the agency name.
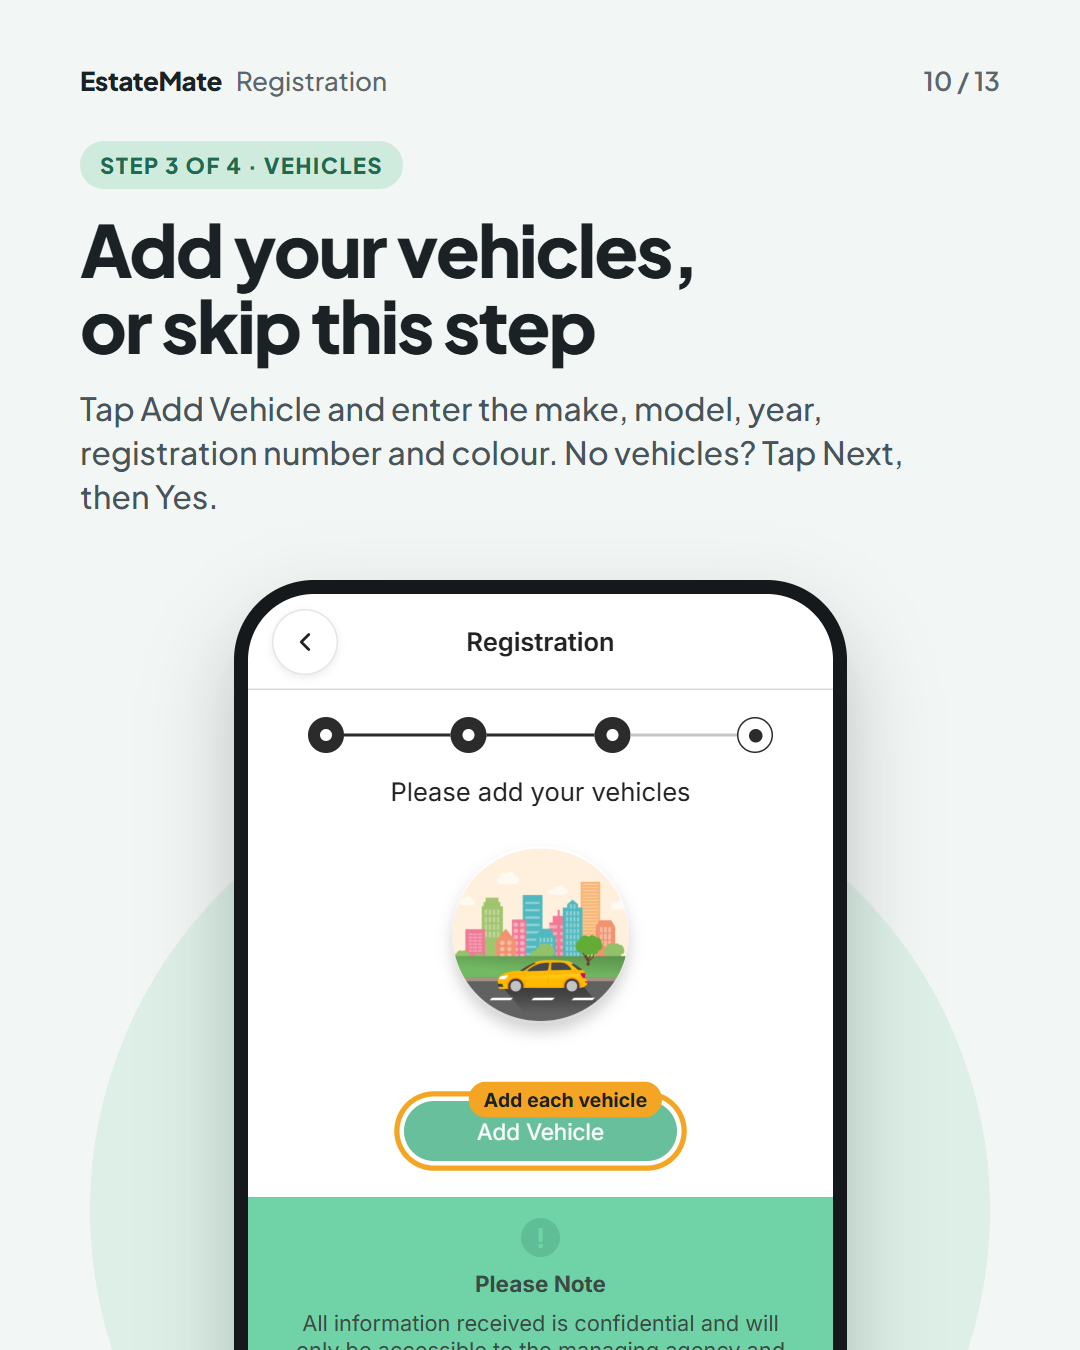
Step 3 of 4: add your vehicles, or skip
Tap Add Vehicle and enter the make, model, year, registration number and colour. Repeat for each vehicle. No vehicles? Tap Next, then Yes when the app asks if you're sure.
The app notes that this information is confidential and only your managing agency and management committee can see it.
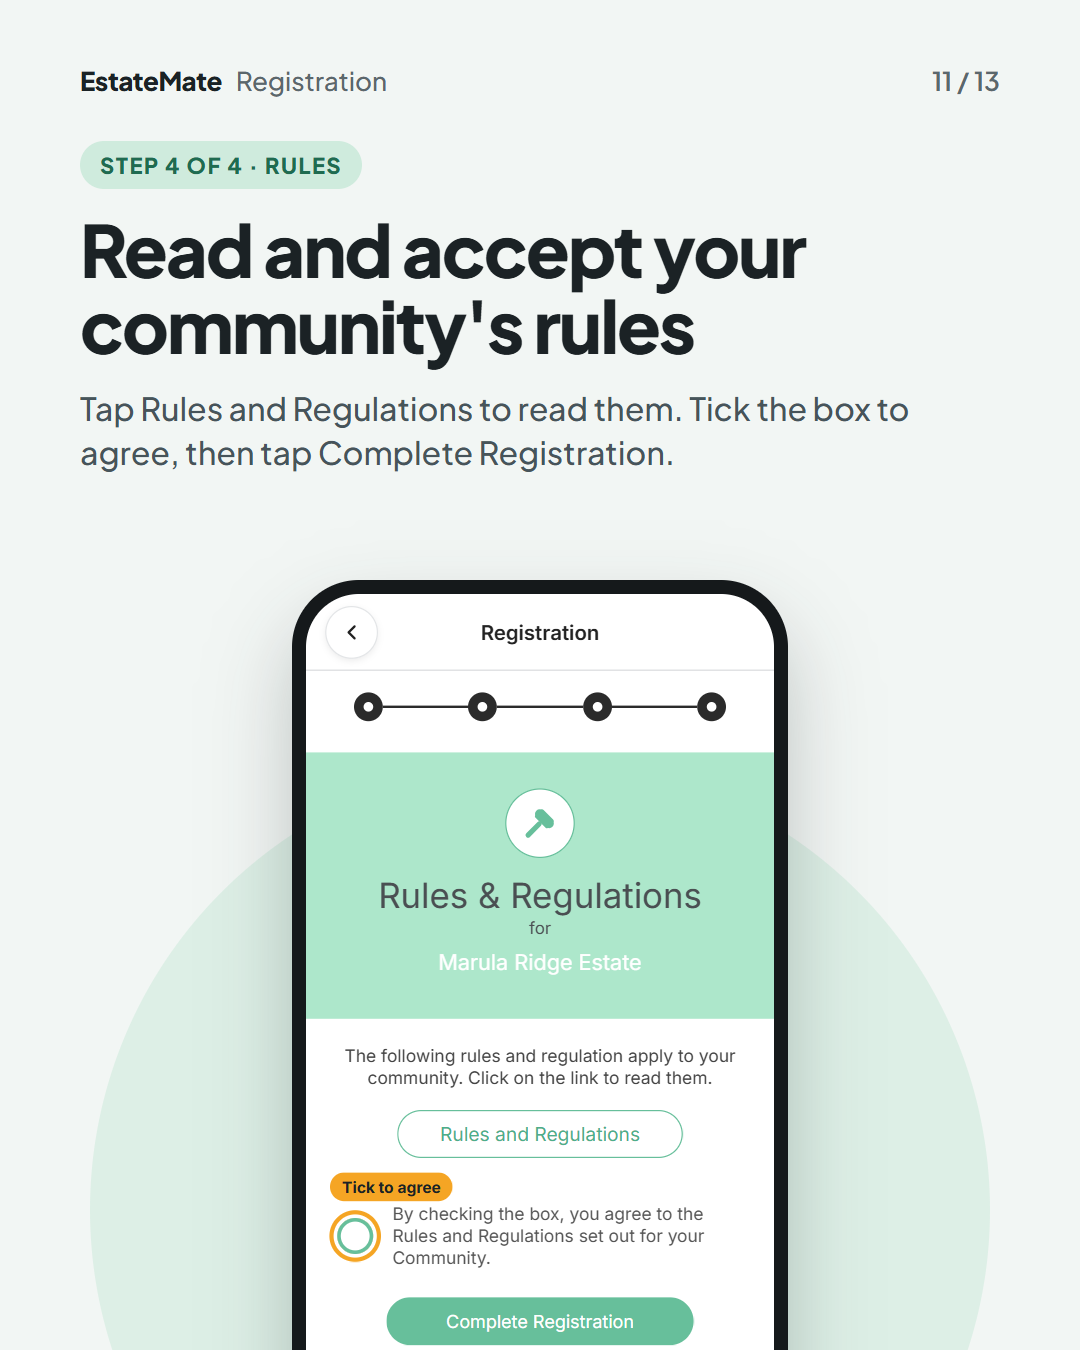
Step 4 of 4: read and accept your community's rules
Tap Rules and Regulations to read your community's rules. Tick the box to agree, then tap Complete Registration.
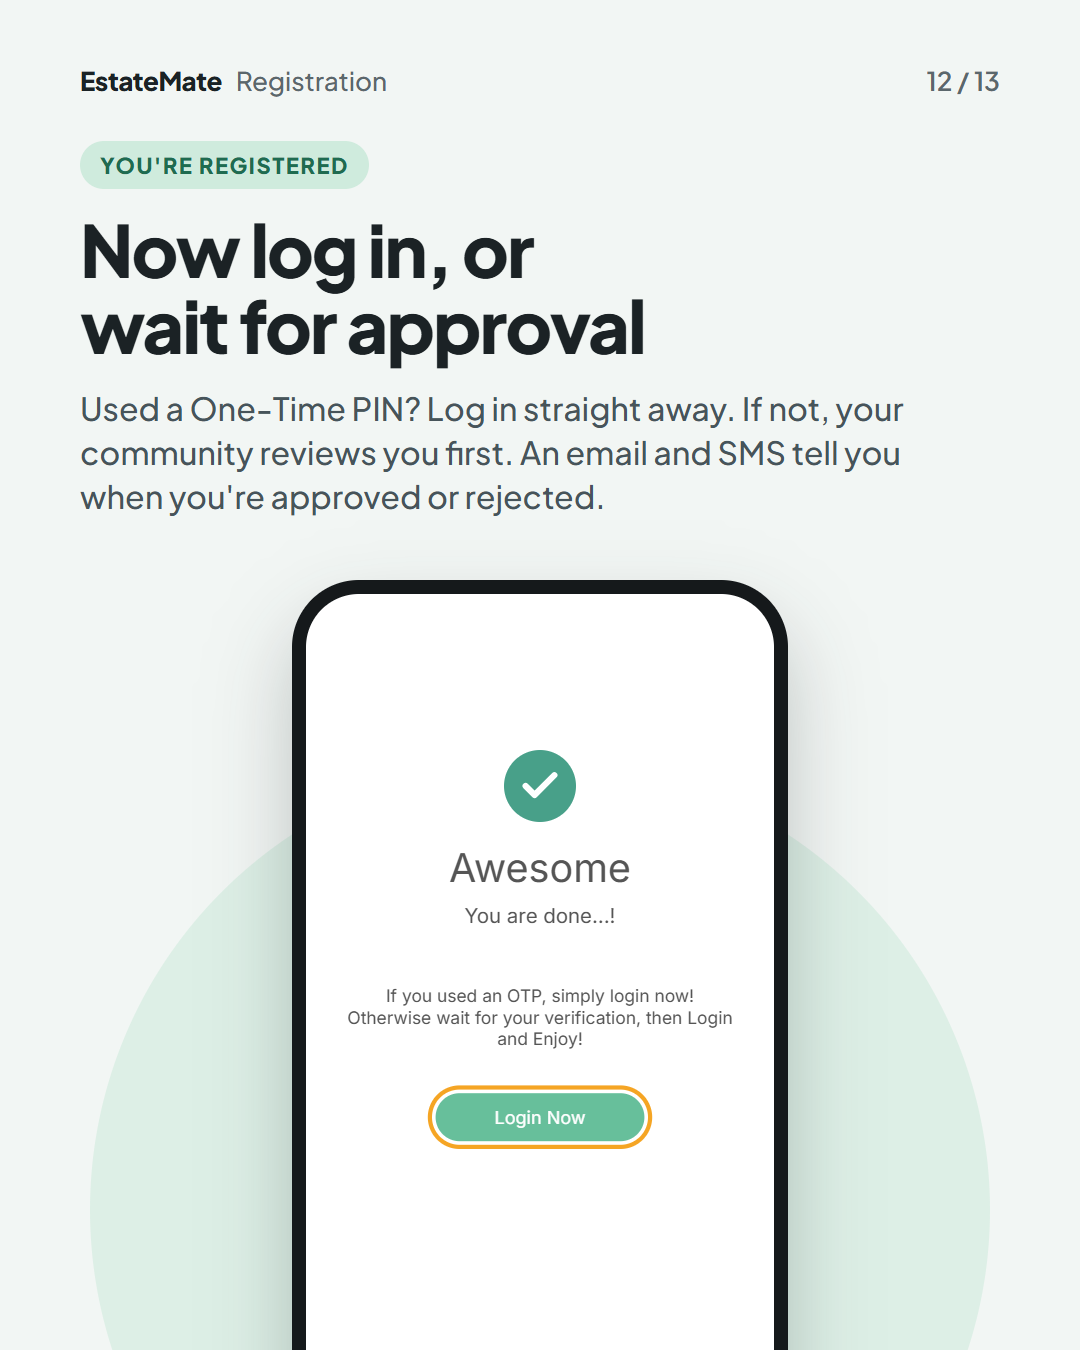
You're registered: log in, or wait for approval
If you used a One-Time PIN, tap Login Now and log in straight away. If not, your community reviews your registration first. You'll get an email and an SMS when you're approved or rejected. Once you're approved, log in with your email address and password.
We're listening
We don't always get it right first time. Building something flexible enough for hundreds of communities, each with its own way of doing things, is always a good challenge. Your feedback is how we make it better. If something feels harder than it should, please let us know at support@estatemate.co.za.
Before you start
Have these ready: an email address and phone number you check, your property number, and your vehicle details if you have any. If you received a One-Time PIN (OTP), keep it at hand.
Your community decides who joins. Approval is done by your community, not by EstateMate. If you've waited a while and heard nothing, contact your community's manager.
If something goes wrong
- Your property number isn't accepted. See card 7: choose your estate first, tap the number in the list, and ask your community's manager if the number isn't there.
Still stuck?
Send us a request. We’ll know you were reading this guide, so you won’t have to explain where you are.